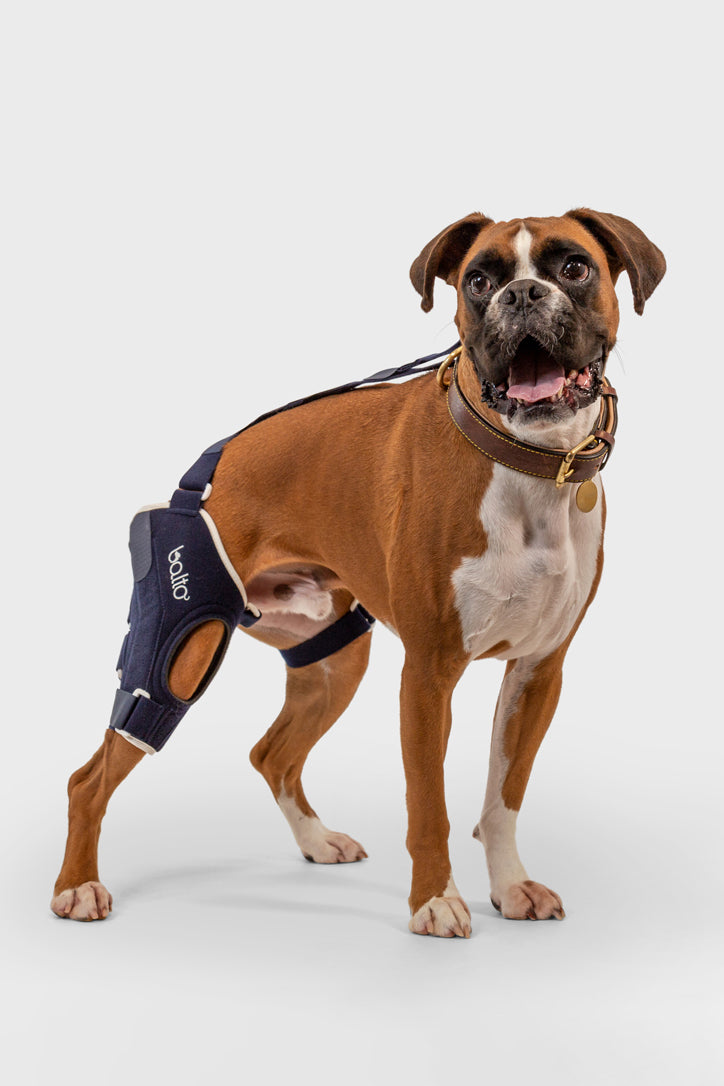
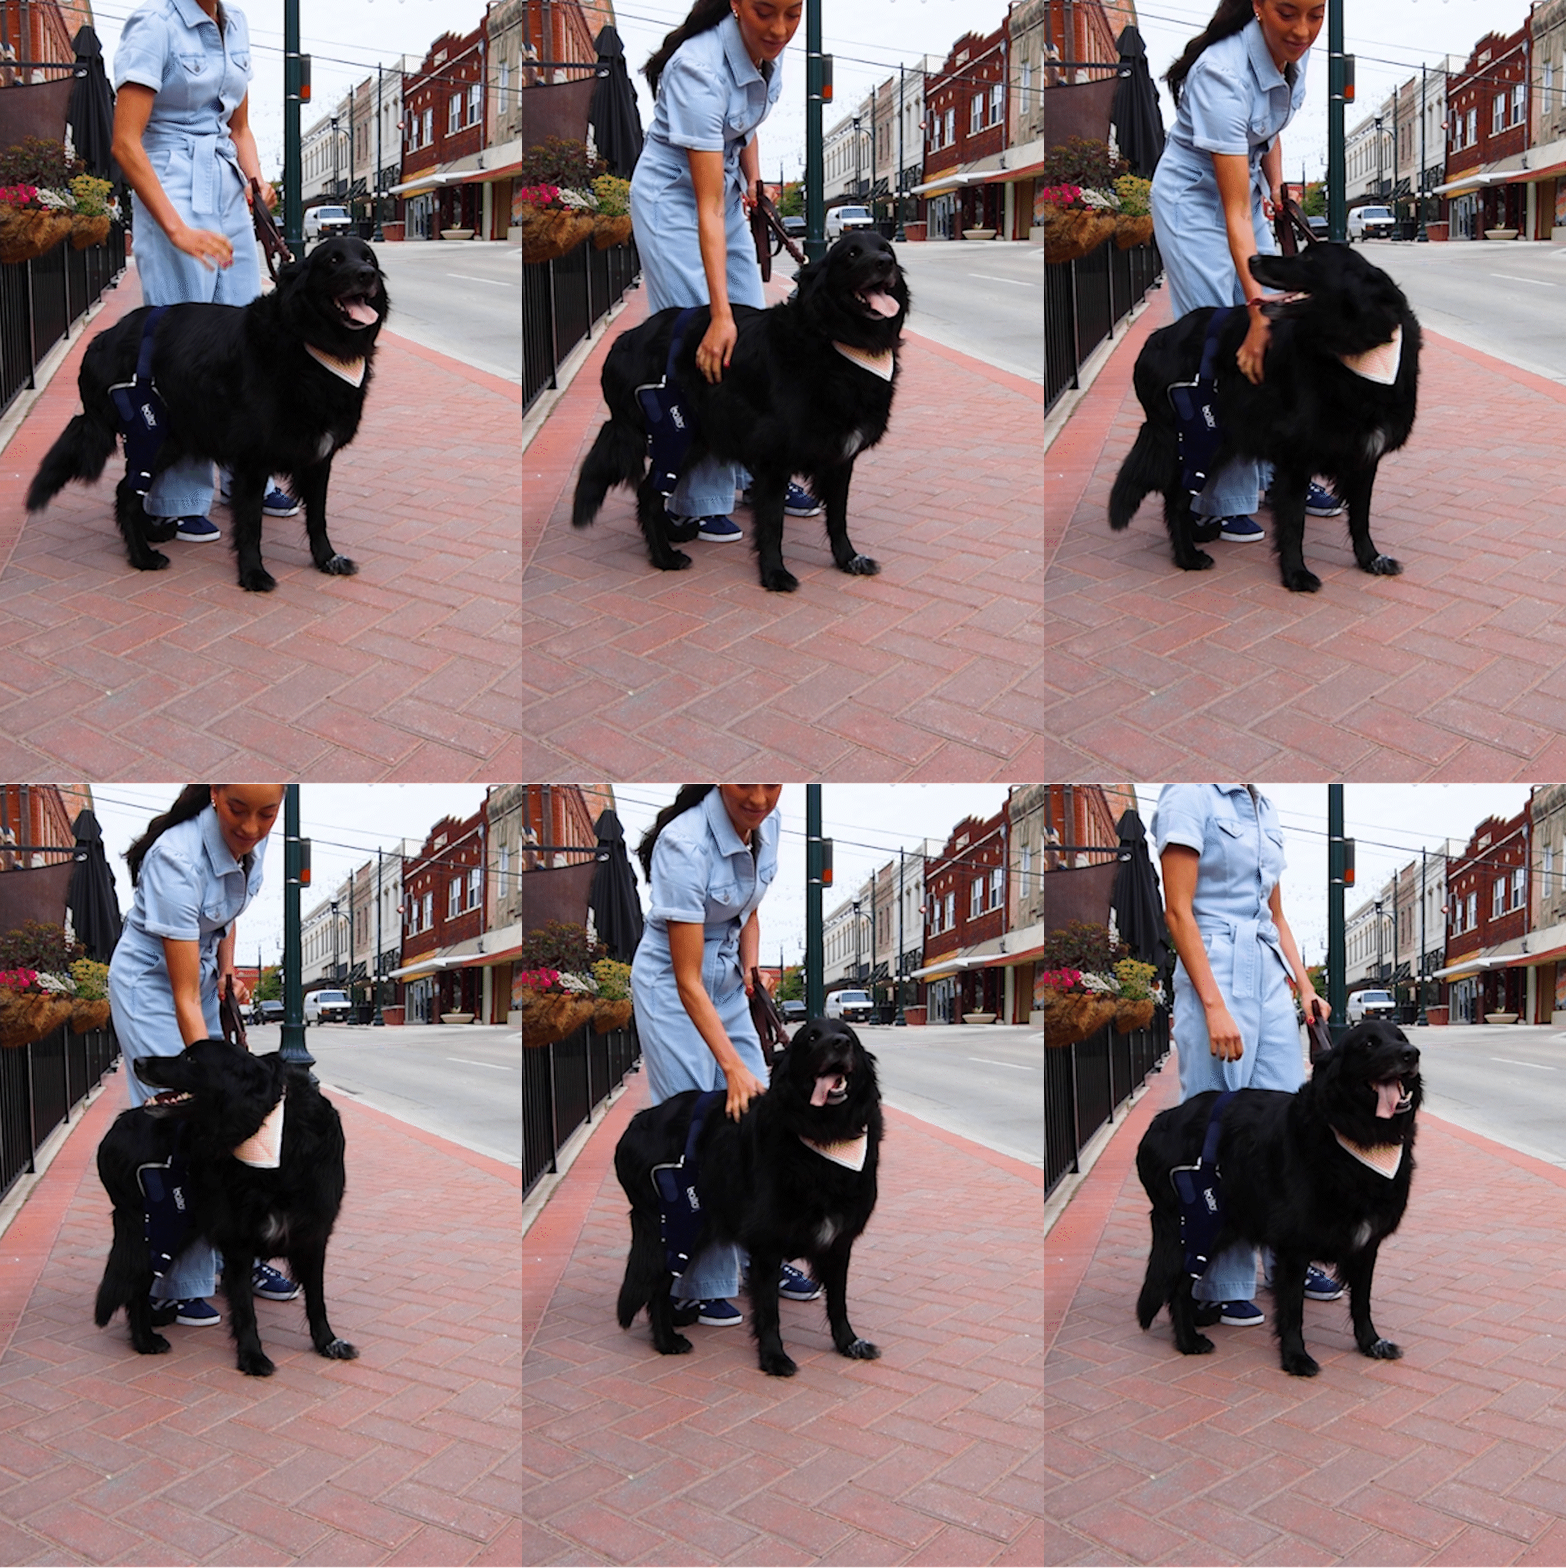
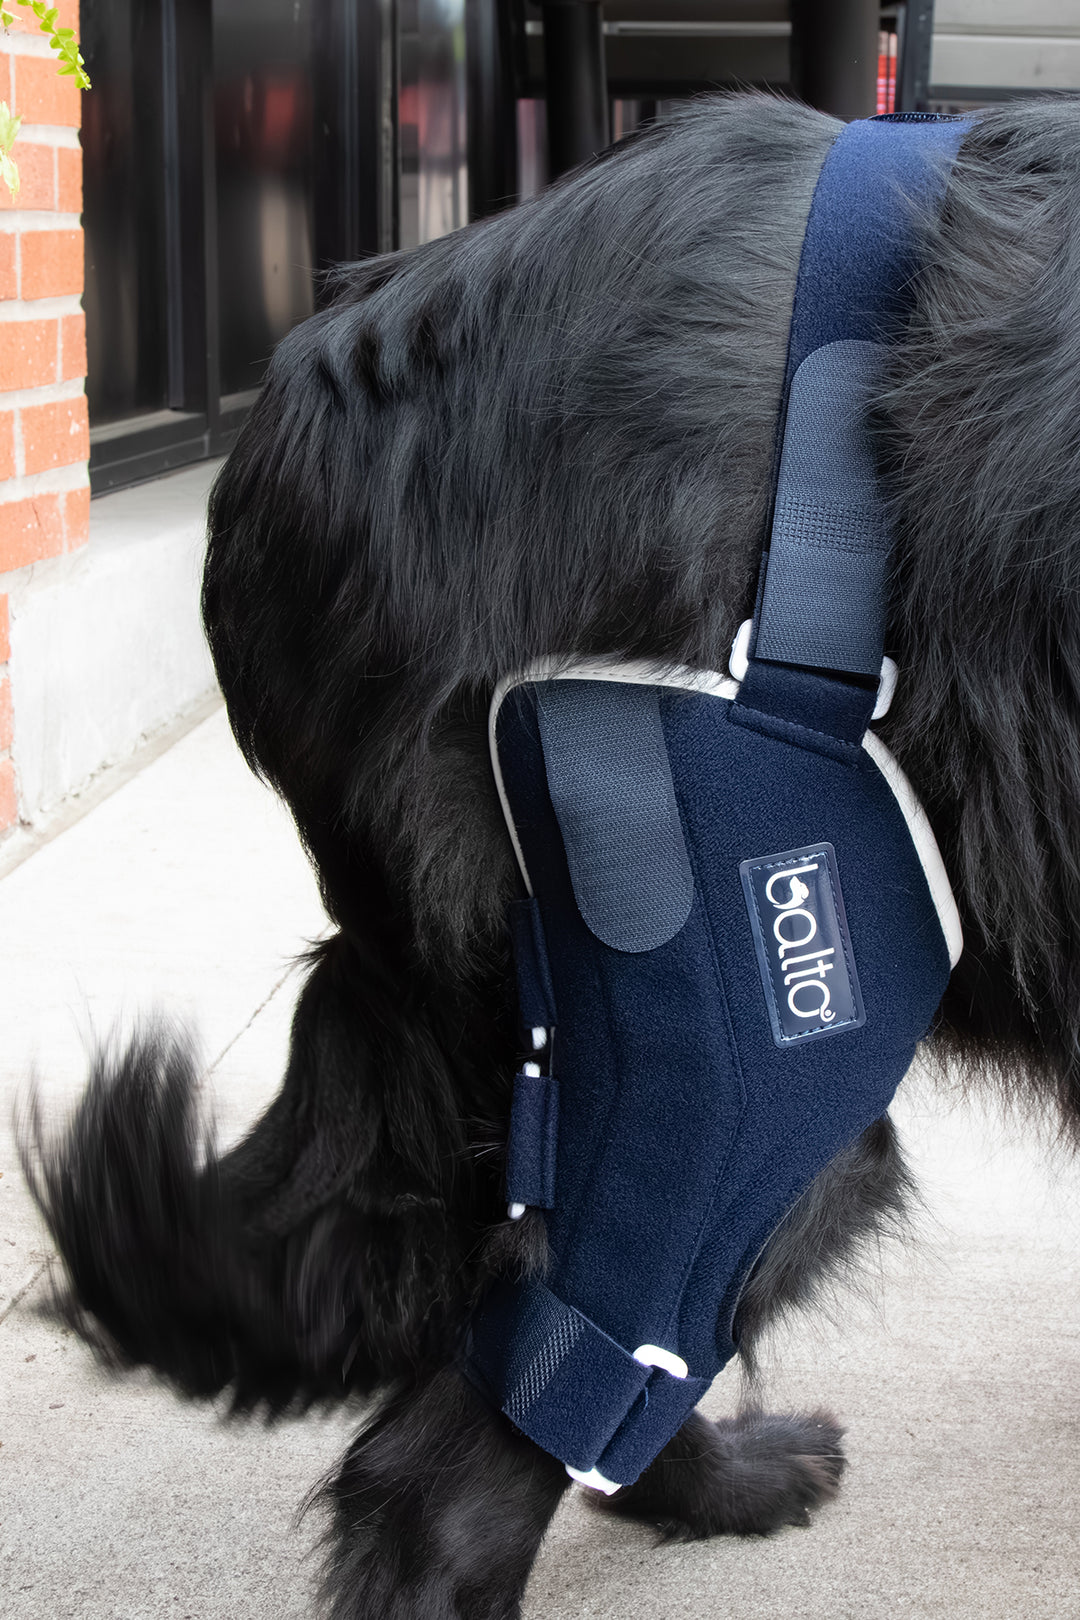
The Balto® Jump stifle knee brace is carefully designed to stabilize your dog's post-traumatic or acquired knee joint deficiency. The Balto® Jump is designed to support one of the most common injuries in canines, Cranial Cruciate Ligament (CCL) trauma. Annually impacting millions of patients, CCL injuries encompass various complications including patellar luxation, arthrosis, arthritis, varus/valgus instability, and luxation of the ligament. This canine knee joint device is an excellent remedy for canines with restricted mobility due to CCL joint injuries. Constructed from a breathable compression material and constructed from a material other than neoprene, it gives your dog's hind limbs support and stability without impeding their natural movement. When a dog maintains an active lifestyle and requires additional knee support, this knee brace is an outstanding option.
BRACE APPLICATIONS
CCL tears (partial and full)
Partial CCL tears can take about 6 months to stabilize, and up to a year to form mature scar tissue to stabilize the knee to regular function.
Full CCL tears, depending on severity, can take up to a year to stabilize and an additional year to form mature scar tissue that can stabilize the knee to regular function.
Post-surgical support (for surgeries such as TPLO, TTA, ELSS, and MPL)
Structural support to injured or affected limbs
Chronic canine knee pain management
A complimentary treatment to physical therapy that can be combined with acupuncture and hydrotherapy
Adverse conditions or a preference for conservative care; bracing can be utilized in place of surgery for patients who are not eligible.
When applied to healthy ligaments, muscles, and joints, this brace can help to prevent further damage and offer structural support.
BRACE FEATURES
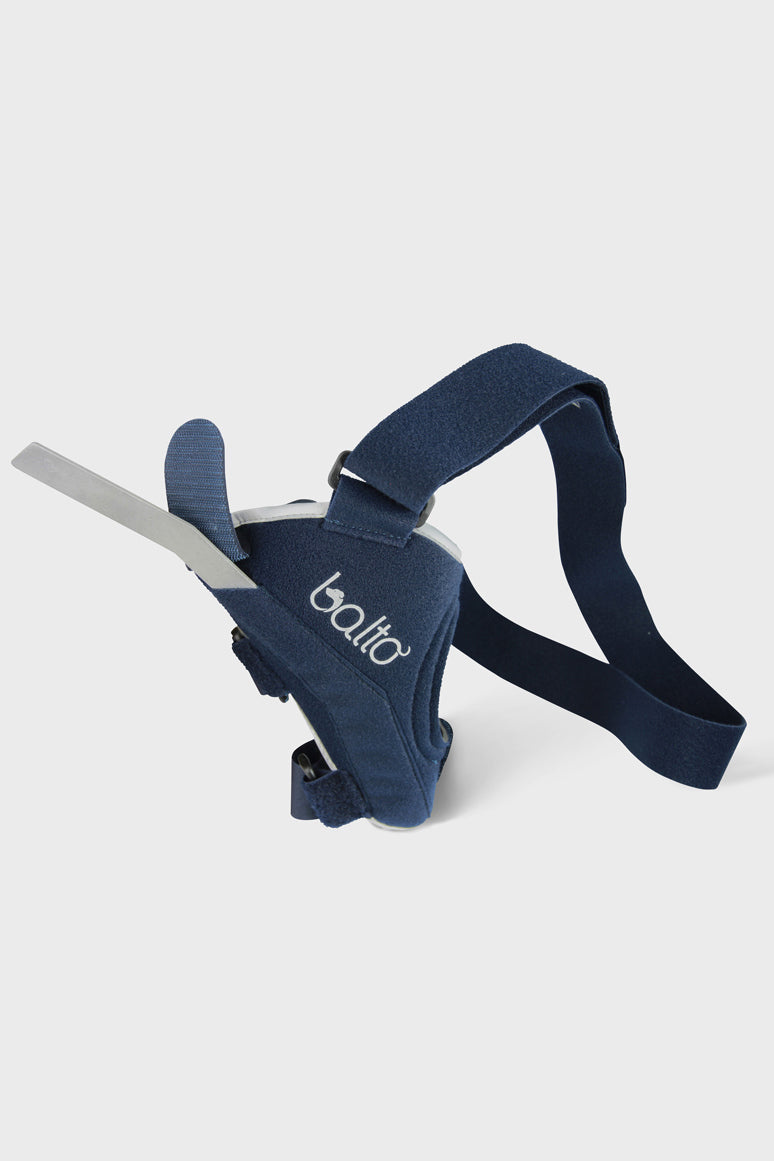
Two pockets which contain angled airplane aluminum splints (medial and lateral) that help restrict the lateral movement (also referred to as a drawer movement) of the knee when necessary.
Abdominal band to ensure the brace is secured around the dog’s hind end.
A third, additional stabilization strap is provided for more active animals.
The brace can also be used without splints for conditions such as arthritis and arthrosis.
Compression helps increase blood flow in the affected area, which helps reduce stiffness, pain, and inflammation
Adjustable upper and lower padding straps can be lengthened or shortened on the leg to ensure an excellent fit
Using the Balto® Jump on both the left and right knees can also help with cases related to:
Senior dogs as a result of general degenerative process
Overweight dogs dealing with high pressure on their good leg
Active dogs with an important compensation behavior
Comes in sizes xx-small through x-large, for a left or right orientation. Please note that the xx-small size can only be worn in female orientation (in small breeds this is okay for most males) and is unable to be connected to a second knee brace to provide bilateral support. To find the best size for your pet, visit the sizing chart here
Non-neoprene braces from Balto® are constructed from superior materials; neoprene is notorious for harboring pathogens, offering insufficient support, and deteriorating rapidly. A range of dimensions guarantees a snug fit. A no-pinch product.
Recommended for all ages, unless veterinarians advise otherwise. When applicable, apply the brace in proportionate increments of time ffor animals under the age of two to avoid potential growth disruptions.
Used to stabilize the knee and provide compression.
Used to stabilize the knee and provide compression bilaterally.
Used to control the range of motion (ROM) and stabilize the knee.
Splints
The aluminum (slightly adjustable) splints are removable.
The aluminum (slightly adjustable) splints are removable bilaterally.
The aluminum splints are not removable, but are adjustable.
Fit
Uses adjustable Velcro for a secure fit and comes with a male and female anchor kit.
Uses adjustable Velcro for a secure fit while the braces anchor together across the back.
Uses adjustable hinges and padding for a secure fit and comes with a kit for setting the range of motion (ROM).
Size Chart
SIZE
WEIGHT
A
B
C
XX-Small
5 - 10 lbs
3" - 5"
1" - 2"
3"
X-Small
10 - 20 lbs
6" - 7"
2" - 2.75"
4"
Small
20 - 45 lbs
8" - 10"
3" - 6"
6"
Medium
35 - 65 lbs
10" - 12"
4" - 6"
7"
Large
60 - 100 lbs
11.5" - 13"
4.75" - 7"
8.75"
X-Large
100 - 135 lbs
14" - 18"
7" - 9"
9.25"
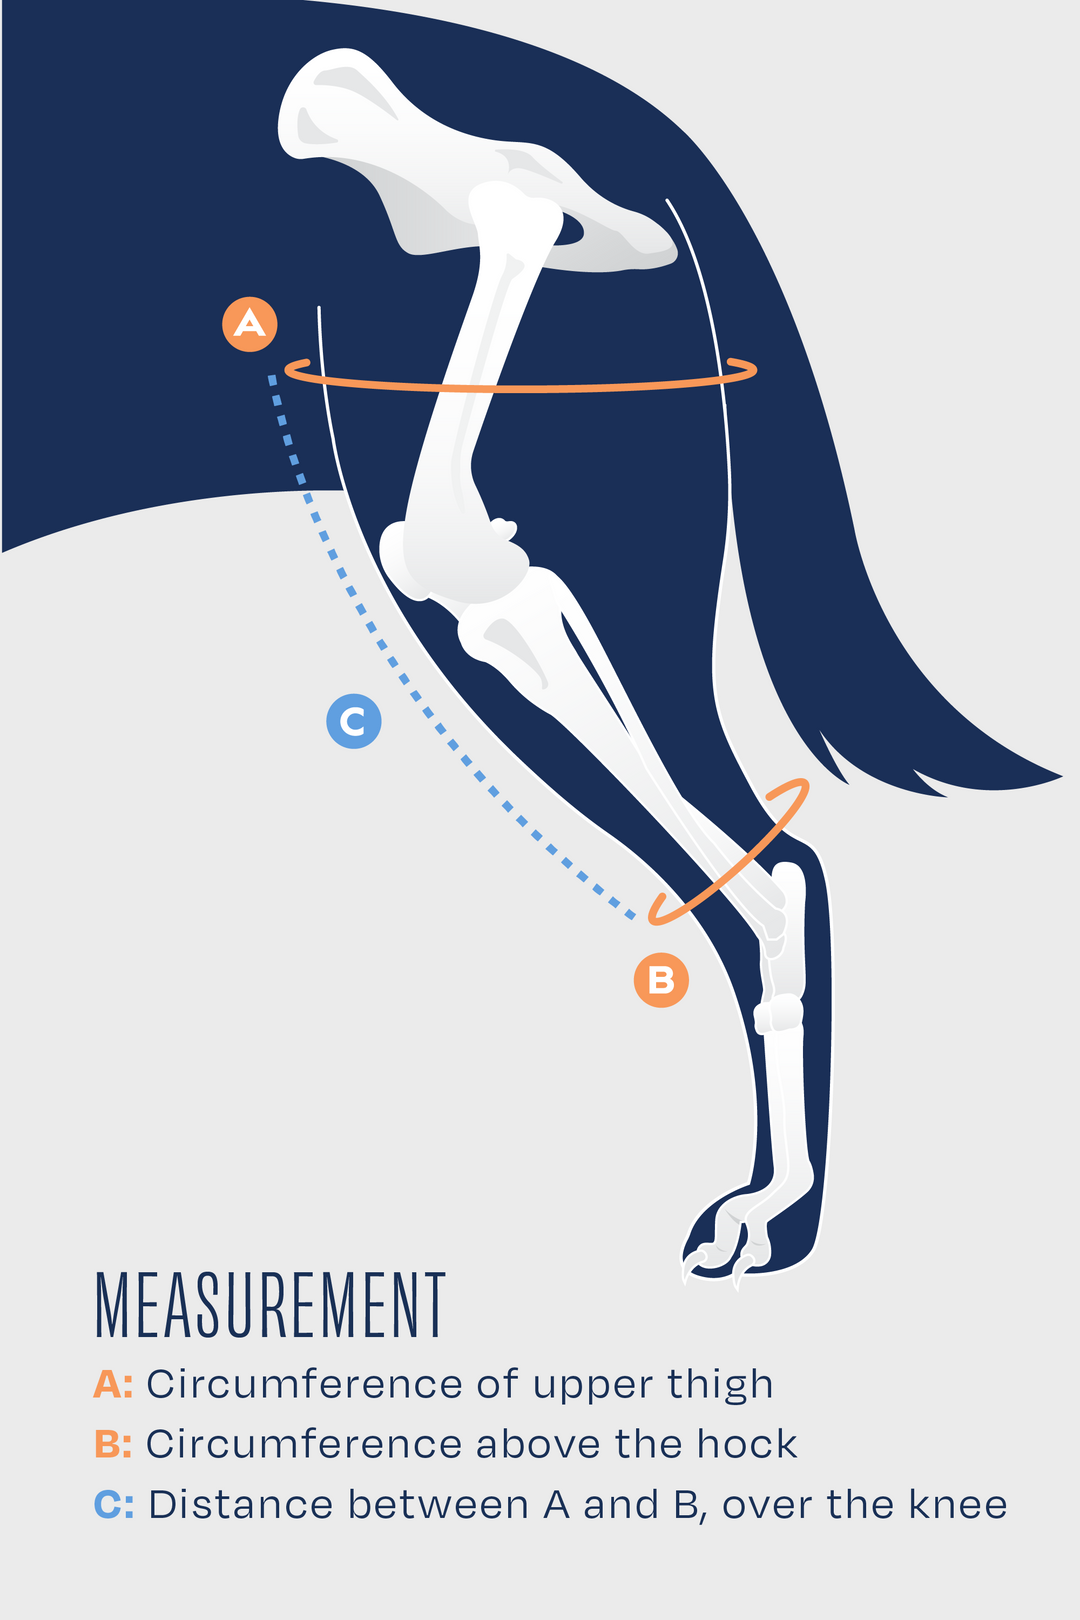
Measurement A: Circumference of middle to upper thigh Measurement B: Circumference above the hock Measurement C: Distance between A and B over the knee
SIZE
WEIGHT
A
B
C
XX-Small
2-5kg
8-13 cm
3-5 cm
8 cm
X-Small
5-10kg
16-18 cm
5-7 cm
10 cm
Small
10 -15kg
21-25 cm
8-15 cm
15 cm
Medium
15 -30kg
26-31 cm
10-16 cm
18 cm
Large
28 –50kg
29-34 cm
12-18 cm
22 cm
X-Large
Over 50kg
36 cm - 45.7 cm
17.8 am - 22.8 cm
25 cm
Measurement A:Circumference of middle to upper thigh Measurement B: Circumference above the hock Measurement C: Distance between A and B over the knee
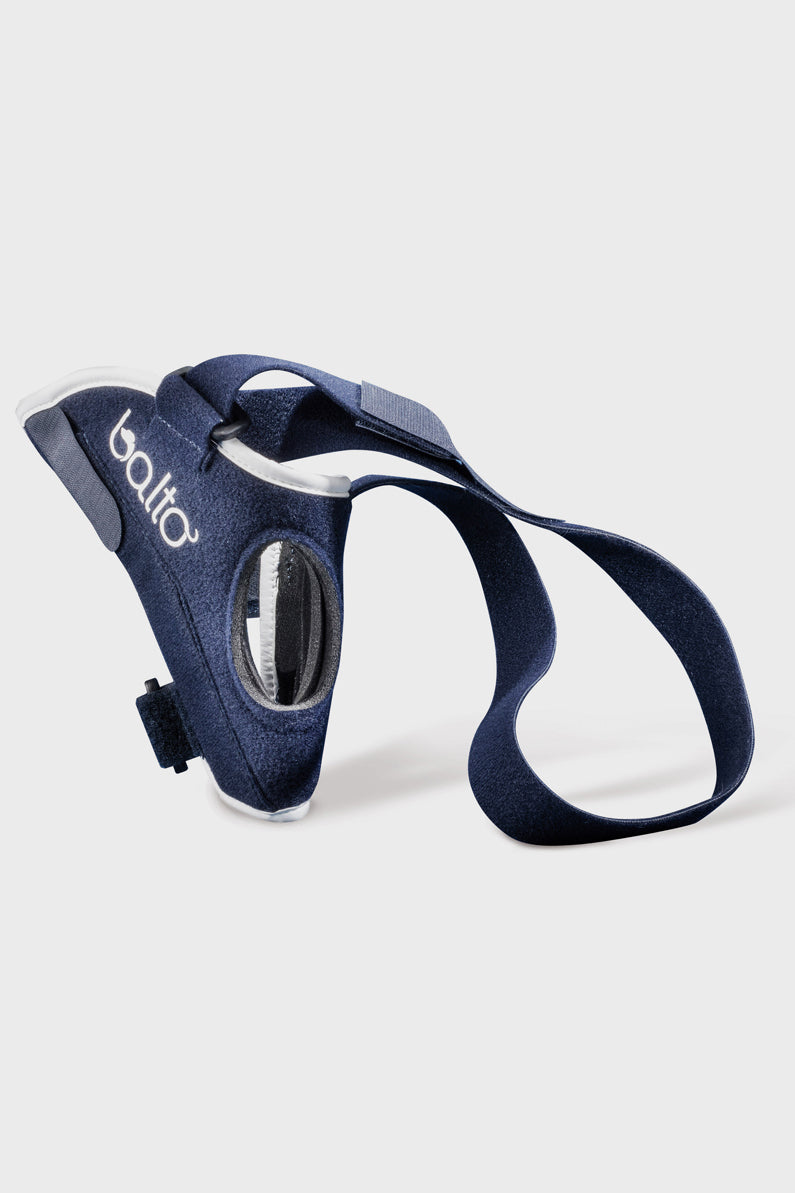
Position the brace by lining up the central hole with the dog’s knee (patella) and secure all the Velcro straps (starting with the bottom strap) around the leg by passing them through the buckles. Tightly close with the Velcro straps.
Step 3
Pass the back strap under the belly and over the dog’s back.
Step 4
Pass the band towards the brace buckle on the other leg. Insert the band into the buckle and close securely.
Step 5
The band is adjustable, remove the rounded Velcro end. Cut the Velcro strap to the desired length. Re-apply to the rounded Velcro end.
Step 6
Stick the band on itself, closing it tight.
Step 7
Apply one side of the harness strap under a harness or collar, and the other side under the back strap and closing it tight.
INSTRUCTION WITH ANCHOR KIT (MALE)
Step 1
Prepare the brace by opening the straps (Fig. 1).
Step 2
Position the brace by lining up the central hole with the dog’s knee (patella) and secure all the Velcro straps (starting with the bottom strap) around the leg by passing them through the buckles. Tightly close with the Velcro straps.
Step 3
Pass the back strap over the dog’s back, open up the anchor kit, and close it around the top of the contralateral leg. Tightly close with the Velcro strap.
Step 4
The straps and anchor kit are adjustable: Remove the Velcro ends and cut the strap to the desired length. Reapply the Velcro ends and tightly close with the Velcro strap to ensure the brace is stable.
Step 5
Pass the collar strap under the collar or harness (Fig. 5A and 5B) and attach the other strap under the back strap (Fig. 5C).
NOTE: Exchanges and returns will NOT be accepted if the brace is altered.
INSTRUCTION WITHOUT ANCHOR KIT (FEMALE)
Step 1
Prepare the brace by opening the straps and remove the anchor kit (Fig. A1). Make sure the back strap is attached to the inner thigh (lower) buckle (Fig. A2).
Step 2
Position the brace by lining up the central hole with the dog’s knee (patella) and secure all the Velcro straps (starting with the bottom strap) around the leg by passing them through the buckles. Tightly close with the Velcro straps.
Step 3
Pass the back strap UNDER the abdomen and over the back. Insert it into the top buckle of the brace and tightly close with the Velcro strap.
Step 4
The straps and anchor kit are adjustable: Remove the Velcro ends and cut the strap to the desired length. Reapply the Velcro ends and tightly close with the Velcro strap to ensure the brace is stable.
Step 5
Pass the collar strap under the collar or harness (Fig. 5A and 5B) and attach the other strap under the back strap (Fig. 5C).
NOTE: Exchanges and returns will NOT be accepted if the brace is altered.
Tips & Tricks
Allow up to two weeks for your pet to fully accept the brace
Wear the brace for 30 minutes a day, increasing 30 minutes each day after, for up to 12 hours
Consult your veterinarian for specific instructions on when to wear your brace
Remove the brace when your animal sleeps at night
Inspect your pet for signs of skin irritation. If any are present, contact your veterinarian
In addition to wiping the brace clean, keep skin and fur that comes into contact with the brace clean
Inspect your brace regularly for any damage
CONTACT US
Maintenance & Repair
A clean brace not only prevents infections, irritation, and a stinky smell; but it also allows your brace to last longer. To help support the longevity of your bracing device, here are some of our tips on how to properly clean your orthopedic bracing:
Remove as much hair as possible from any Velcro® frequently to prevent compaction.
Use lint roller or lightly adhesive tape to remove hair from the material of the brace.
By hand, use warm water and a gentle cleansing soap to remove any stains and odors.
Rinse soap thoroughly from the brace
Hang to dry. Once the brace is completely dry, it is ready for use!
The Balto® Jump stifle knee brace is carefully designed to stabilize your dog's post-traumatic or acquired knee joint deficiency. The Balto® Jump is designed to support one of the most common injuries in canines, Cranial Cruciate Ligament (CCL) trauma. Annually impacting millions of patients, CCL injuries encompass various complications including patellar luxation, arthrosis, arthritis, varus/valgus instability, and luxation of the ligament. This canine knee joint device is an excellent remedy for canines with restricted mobility due to CCL joint injuries. Constructed from a breathable compression material and constructed from a material other than neoprene, it gives your dog's hind limbs support and stability without impeding their natural movement. When a dog maintains an active lifestyle and requires additional knee support, this knee brace is an outstanding option.
BRACE APPLICATIONS
CCL tears (partial and full)
Partial CCL tears can take about 6 months to stabilize, and up to a year to form mature scar tissue to stabilize the knee to regular function.
Full CCL tears, depending on severity, can take up to a year to stabilize and an additional year to form mature scar tissue that can stabilize the knee to regular function.
Post-surgical support (for surgeries such as TPLO, TTA, ELSS, and MPL)
Structural support to injured or affected limbs
Chronic canine knee pain management
A complimentary treatment to physical therapy that can be combined with acupuncture and hydrotherapy
Adverse conditions or a preference for conservative care; bracing can be utilized in place of surgery for patients who are not eligible.
When applied to healthy ligaments, muscles, and joints, this brace can help to prevent further damage and offer structural support.
BRACE FEATURES
Two pockets which contain angled airplane aluminum splints (medial and lateral) that help restrict the lateral movement (also referred to as a drawer movement) of the knee when necessary.
Abdominal band to ensure the brace is secured around the dog’s hind end.
A third, additional stabilization strap is provided for more active animals.
The brace can also be used without splints for conditions such as arthritis and arthrosis.
Compression helps increase blood flow in the affected area, which helps reduce stiffness, pain, and inflammation
Adjustable upper and lower padding straps can be lengthened or shortened on the leg to ensure an excellent fit
Using the Balto® Jump on both the left and right knees can also help with cases related to:
Senior dogs as a result of general degenerative process
Overweight dogs dealing with high pressure on their good leg
Active dogs with an important compensation behavior
Comes in sizes xx-small through x-large, for a left or right orientation. Please note that the xx-small size can only be worn in female orientation (in small breeds this is okay for most males) and is unable to be connected to a second knee brace to provide bilateral support. To find the best size for your pet, visit the sizing chart here
Non-neoprene braces from Balto® are constructed from superior materials; neoprene is notorious for harboring pathogens, offering insufficient support, and deteriorating rapidly. A range of dimensions guarantees a snug fit. A no-pinch product.
Recommended for all ages, unless veterinarians advise otherwise. When applicable, apply the brace in proportionate increments of time ffor animals under the age of two to avoid potential growth disruptions.
Used to stabilize the knee and provide compression.
Used to stabilize the knee and provide compression bilaterally.
Used to control the range of motion (ROM) and stabilize the knee.
Splints
The aluminum (slightly adjustable) splints are removable.
The aluminum (slightly adjustable) splints are removable bilaterally.
The aluminum splints are not removable, but are adjustable.
Fit
Uses adjustable Velcro for a secure fit and comes with a male and female anchor kit.
Uses adjustable Velcro for a secure fit while the braces anchor together across the back.
Uses adjustable hinges and padding for a secure fit and comes with a kit for setting the range of motion (ROM).
Size Chart
SIZE
WEIGHT
A
B
C
XX-Small
5 - 10 lbs
3" - 5"
1" - 2"
3"
X-Small
10 - 20 lbs
6" - 7"
2" - 2.75"
4"
Small
20 - 45 lbs
8" - 10"
3" - 6"
6"
Medium
35 - 65 lbs
10" - 12"
4" - 6"
7"
Large
60 - 100 lbs
11.5" - 13"
4.75" - 7"
8.75"
X-Large
100 - 135 lbs
14" - 18"
7" - 9"
9.25"
Measurement A: Circumference of middle to upper thigh Measurement B: Circumference above the hock Measurement C: Distance between A and B over the knee
SIZE
WEIGHT
A
B
C
XX-Small
2-5kg
8-13 cm
3-5 cm
8 cm
X-Small
5-10kg
16-18 cm
5-7 cm
10 cm
Small
10 -15kg
21-25 cm
8-15 cm
15 cm
Medium
15 -30kg
26-31 cm
10-16 cm
18 cm
Large
28 –50kg
29-34 cm
12-18 cm
22 cm
X-Large
Over 50kg
36 cm - 45.7 cm
17.8 am - 22.8 cm
25 cm
Measurement A:Circumference of middle to upper thigh Measurement B: Circumference above the hock Measurement C: Distance between A and B over the knee
Position the brace by lining up the central hole with the dog’s knee (patella) and secure all the Velcro straps (starting with the bottom strap) around the leg by passing them through the buckles. Tightly close with the Velcro straps.
Step 3
Pass the back strap under the belly and over the dog’s back.
Step 4
Pass the band towards the brace buckle on the other leg. Insert the band into the buckle and close securely.
Step 5
The band is adjustable, remove the rounded Velcro end. Cut the Velcro strap to the desired length. Re-apply to the rounded Velcro end.
Step 6
Stick the band on itself, closing it tight.
Step 7
Apply one side of the harness strap under a harness or collar, and the other side under the back strap and closing it tight.
INSTRUCTION WITH ANCHOR KIT (MALE)
Step 1
Prepare the brace by opening the straps (Fig. 1).
Step 2
Position the brace by lining up the central hole with the dog’s knee (patella) and secure all the Velcro straps (starting with the bottom strap) around the leg by passing them through the buckles. Tightly close with the Velcro straps.
Step 3
Pass the back strap over the dog’s back, open up the anchor kit, and close it around the top of the contralateral leg. Tightly close with the Velcro strap.
Step 4
The straps and anchor kit are adjustable: Remove the Velcro ends and cut the strap to the desired length. Reapply the Velcro ends and tightly close with the Velcro strap to ensure the brace is stable.
Step 5
Pass the collar strap under the collar or harness (Fig. 5A and 5B) and attach the other strap under the back strap (Fig. 5C).
NOTE: Exchanges and returns will NOT be accepted if the brace is altered.
INSTRUCTION WITHOUT ANCHOR KIT (FEMALE)
Step 1
Prepare the brace by opening the straps and remove the anchor kit (Fig. A1). Make sure the back strap is attached to the inner thigh (lower) buckle (Fig. A2).
Step 2
Position the brace by lining up the central hole with the dog’s knee (patella) and secure all the Velcro straps (starting with the bottom strap) around the leg by passing them through the buckles. Tightly close with the Velcro straps.
Step 3
Pass the back strap UNDER the abdomen and over the back. Insert it into the top buckle of the brace and tightly close with the Velcro strap.
Step 4
The straps and anchor kit are adjustable: Remove the Velcro ends and cut the strap to the desired length. Reapply the Velcro ends and tightly close with the Velcro strap to ensure the brace is stable.
Step 5
Pass the collar strap under the collar or harness (Fig. 5A and 5B) and attach the other strap under the back strap (Fig. 5C).
NOTE: Exchanges and returns will NOT be accepted if the brace is altered.
Allow up to two weeks for your pet to fully accept the brace
Wear the brace for 30 minutes a day, increasing 30 minutes each day after, for up to 12 hours
Consult your veterinarian for specific instructions on when to wear your brace
Remove the brace when your animal sleeps at night
Inspect your pet for signs of skin irritation. If any are present, contact your veterinarian
In addition to wiping the brace clean, keep skin and fur that comes into contact with the brace clean
Inspect your brace regularly for any damage
A clean brace not only prevents infections, irritation, and a stinky smell; but it also allows your brace to last longer. To help support the longevity of your bracing device, here are some of our tips on how to properly clean your orthopedic bracing:
Remove as much hair as possible from any Velcro® frequently to prevent compaction.
Use lint roller or lightly adhesive tape to remove hair from the material of the brace.
By hand, use warm water and a gentle cleansing soap to remove any stains and odors.
Rinse soap thoroughly from the brace
Hang to dry. Once the brace is completely dry, it is ready for use!
Difficult to get the jump brace into place on my severely injured dog. I really wanted to love this, and I was hoping it would help his torn CCL. I think it made it worse! It slid off his back even though it was attached to his collar and the opposite side leg band. I do not recommend!
BC
Balto® Canada
April 27, 2026
We’re sorry to hear about your experience and understand how challenging it can be to fit a brace on a dog with a serious injury.
For stability, we’ve found the back strap anchors much more securely when attached to a body harness rather than a collar, as collars can shift and cause the brace to move out of position. Proper fit and placement can make a significant difference in performance.
If you have any questions about adjustments or setup, please feel free to reach out to our team—we’re happy to help guide you.
S
Susan
Verified Buyer
I do not recommend this product
Rated 1 out of 5 stars
July 22, 2025
Don’t waste your money
Very poor fit, my dog hated it when I tried to put it on. I never examined the brace when I got it so when I returned it in the exact same shape I received it I never got my money back. Horrible customer service
BC
Balto® Canada
September 22, 2025
Hi Susan, we’re truly sorry to hear that you had a disappointing experience. We understand how frustrating it can be when a product doesn’t work out as hoped. Our return policy does require that items be sent back in clean, unused condition, and unfortunately the brace we received did not meet those requirements. For that reason, we weren’t able to process a refund and sent the brace back to you. We never want our customers to feel let down, and we’ll continue working to make sure our policies are as clear and helpful as possible.